For responsible gun owners, secure storage isn’t optional; it’s imperative. While basements and garages are common safe locations, closets offer a compelling alternative: discreet, accessible, and often more climate-controlled. But installing a heavy gun safe in a confined closet space requires careful planning and execution. This comprehensive guide walks you through every step to ensure your firearms are protected and your installation is safe and successful.
Exclusive Deals
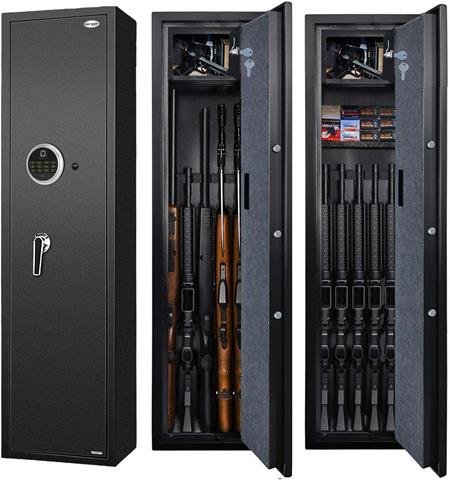
Limited-time Exclusive Deals. Check current discount on Amazon.
Check Price on Amazon As an Amazon Associate I earn from qualifying purchases.Why Choose a Closet for Your Gun Safe?
-
Discretion: Closets are inherently hidden, keeping your safe out of plain sight from visitors or potential intruders scoping your home.
-
Accessibility: Centrally located bedrooms or hall closets offer quicker access in an emergency compared to a basement or detached garage.
-
Environmental Control: Closets generally experience less drastic temperature and humidity swings than garages or basements, offering better protection for your firearms against rust and corrosion.
-
Space Efficiency: Utilizes often-underused space effectively.
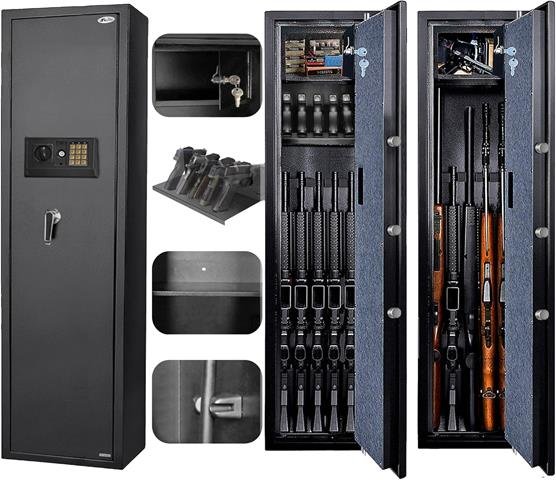
DealExclusive Deals
Limited-time Exclusive Deals. Check current discount on Amazon.
Check Price on Amazon As an Amazon Associate I earn from qualifying purchases. -
Potential Security: The closet door adds an extra layer of obscurity and, potentially, a minor physical barrier.
Pre-Installation: Crucial Planning & Preparation (Measure Twice, Drill Once!)
-
Assess Your Closet:
-
Dimensions: Precisely measure the width, depth, and height of the closet interior. Don’t forget to account for baseboards, door frames, hinges, and any shelving rods.
-
Doorway: Measure the width and height of the closet doorway and the entry door to the room the closet is in. The safe must navigate both.
-
Floor Strength: This is CRITICAL. Most closet floors are standard subflooring (plywood/OSB) over joists, designed for typical storage, not extreme point loads.
-
Identify Joists: Use a stud finder to locate the floor joists running underneath the closet. Knowing their direction and spacing is vital.
DealExclusive Deals
Limited-time Exclusive Deals. Check current discount on Amazon.
Check Price on Amazon As an Amazon Associate I earn from qualifying purchases. -
Weight Capacity: Estimate the total weight: Safe weight + firearms + ammo. Consult a structural engineer if you’re unsure about your floor’s capacity, especially for safes over 300-400 lbs on upper floors. Never guess with weight.
-
-
Ventilation: Closets are enclosed. Will the safe generate heat (like electronic locks)? Is humidity a concern? Plan for potential ventilation needs.
-
Accessibility: Ensure there’s enough space to open the safe door fully and access the interior comfortably once installed.
-
-
Choose the RIGHT Gun Safe:
-
Size: Your closet measurements dictate the maximum external dimensions of the safe. Leave ample clearance (several inches) on all sides and above for maneuvering, anchoring, and ventilation. Prioritize internal capacity needed.
-
Weight: Ensure the floor can support it. Consider weight distribution – longer safes spread load better than tall, narrow ones.
-
Fire Rating: Decide on the level of fire protection needed for your valuables.
-
Security Rating: Look for a safe with a solid, independent security rating (e.g., UL RSC – Residential Security Container).
-
Door Swing: Consider the door swing direction (right vs. left hinge) and ensure it won’t hit walls or shelves when opened fully within the closet space.
-
Delivery & Placement: Discuss delivery options with the seller. Will they bring it to the room? Into the closet? Stairs? Elevator? Be realistic about DIY moving capabilities.
-
-
Gather Essential Tools & Materials:
-
High-quality drill (corded or high-torque battery)
-
Heavy-duty drill bits (masonry bits for concrete, metal/wood bits for subfloor)
-
Socket wrench set or large adjustable wrench
-
Hammer
-
Pry bar (for baseboards if needed)
-
Stud finder
-
Level (preferably 24″ or longer)
-
Tape measure
-
Pencil
-
Safety glasses and gloves
-
Anchoring Kit: Must match your floor type. Typically includes:
-
Concrete Floor: Concrete anchors (wedge anchors, sleeve anchors – size rated for your safe’s weight).
-
Wood Subfloor: Large, thick lag bolts or specialized security bolts (e.g., 1/2″ diameter, 3-5″ long). WASHERS ARE CRITICAL to prevent bolt heads from pulling through the safe’s anchor holes.
-
-
Shim material (plastic or composite shims) if floor is uneven.
-
Optional: Furniture dolly, appliance hand truck, moving blankets, plywood sheets (for distributing weight during move or on weak floors), ventilation fan/grill.
-
The Installation Process: Step-by-Step
Phase 1: Safe Delivery & Placement
-
Prepare the Path:
-
Clear a direct path from the entry point to the closet. Remove rugs, furniture, obstacles, and even closet doors if necessary.
-
Protect floors and walls with moving blankets or cardboard.
-
Have helpers ready! Gun safes are awkward and dangerous to move alone.
-
-
Move the Safe In:
-
Use Proper Equipment: A heavy-duty appliance dolly is essential. Secure the safe to the dolly with straps.
-
Mind the Angles: Carefully navigate corners and doorways. Tilt the dolly only as much as necessary. Remove door stops if needed.
-
Into the Closet: This is often the trickiest part. You may need to carefully slide the safe off the dolly directly onto the closet floor. Use plywood or moving blankets to protect the floor and facilitate sliding. Ensure the safe is positioned exactly where you want it for anchoring and door swing before proceeding.
-
Phase 2: Anchoring – The Non-Negotiable Step
Anchoring prevents theft by making the safe incredibly difficult to pry or carry away. NEVER skip anchoring.
-
Locate Anchor Points & Joists:
-
Inside the safe, locate the pre-drilled anchor holes in the bottom (sometimes also in the back).
-
Carefully mark the center of each hole onto the closet floor using a pencil or marker poked through the hole. Double-check alignment.
-
For Wood Subfloors: Use your stud finder to locate the floor joists underneath your marks. It’s essential that the lag bolts go directly into the center of a floor joist. Adjust the safe’s position slightly if needed to align anchor holes with joists. Mark the joist locations clearly on the floor.
-
-
Drill Pilot Holes:
-
Wood Subfloor: Using a drill bit slightly smaller than the diameter of your lag bolts, drill pilot holes straight down through the subfloor and into the center of the joist at each marked location. Drill deep enough to accommodate the full length of the lag bolt minus the safe’s base thickness.
-
Concrete Floor: Drill holes into the concrete using a hammer drill and a masonry bit sized precisely for the concrete anchors you are using. Drill to the depth specified by the anchor manufacturer. Blow out dust thoroughly.
-
-
Secure the Safe:
-
Wood Subfloor: Place a large, thick washer over each pilot hole. Insert the lag bolt through the safe’s anchor hole, through the washer, and into the pilot hole. Tighten firmly with a wrench/socket, ensuring the safe doesn’t lift. Do not overtighten and strip the wood.
-
Concrete Floor: Insert the concrete anchor sleeve into the hole (if applicable). Place a washer over the anchor bolt. Insert the bolt through the safe’s hole and into the anchor sleeve/concrete hole. Tighten the nut according to the manufacturer’s instructions – this usually involves tightening until snug, then giving it a final specified torque (often 1/2 to 3/4 turn). Do not overtighten and break the anchor.
-
Check All Bolts: Ensure all anchors are tight and secure.
-
Phase 3: Final Checks & Setup
-
Level the Safe (If Necessary):
-
Place your level across the top of the safe (front-to-back and side-to-side). If uneven, carefully tap plastic or composite shims under the low side near the anchor points. Do not shim excessively, as this can compromise stability. Re-check anchor tightness after shimming.
-
-
Test Door Operation:
-
Open and close the safe door fully several times. Ensure it clears all walls, shelves, and the closet door frame smoothly. Check the locking bolts extend and retract properly.
-
-
Address Ventilation & Environment (If Needed):
-
Electronic Locks/Dehumidifiers: If your safe has electronics or you live in a humid area, consider ventilation:
-
Leave a small gap under the closet door.
-
Install a louvered vent in the closet door or wall.
-
Use a GoldenRod or desiccant dehumidifier inside the safe.
-
-
Avoid Moisture: Don’t store damp items in the closet. Ensure no plumbing leaks above/near the closet.
-
-
Reassemble & Organize:
-
Reinstall closet doors carefully (ensure they open fully without hitting the safe).
-
Replace any removed baseboards.
-
Organize firearms and valuables inside the safe securely.
-
Essential Safety & Legal Considerations
-
Firearm Safety Rules: Always treat every firearm as if it is loaded. Keep fingers off the trigger until ready to shoot. Point the muzzle in a safe direction (especially crucial during safe loading/unloading in a confined closet space). Be certain of your target and what’s beyond it.
-
Local Laws & Regulations: Research and strictly comply with all local, state, and federal laws regarding firearm storage, safe installation requirements, and trigger locks. Some jurisdictions have specific mandates.
-
Permits: Check if building permits are required for structural modifications (like reinforcing floors – though anchoring typically doesn’t require one, major reinforcement might).
-
Access Control: Who has the combination or key? Ensure only authorized, responsible individuals have access. Consider a secondary lockbox inside the safe for critical keys/items.
-
Children & Unauthorized Access: The closet location adds discretion but does not replace the need for a secure safe and controlled access. Educate children about firearm safety (EDD – Educate, Deny access, Demonstrate).
Maintenance & Peace of Mind
-
Regularly Check Anchors: Every 6-12 months, verify that all anchoring bolts are still tight.
-
Lubrication: Follow the manufacturer’s instructions for lubricating the lock and locking bolts.
-
Batteries: Replace batteries in electronic locks and dehumidifiers proactively.
-
Safe Interior: Periodically check for moisture or signs of rust. Use appropriate safe interior products.
Conclusion: Secure, Discreet, Accessible Storage Achieved
Installing a gun safe in your closet is a highly effective way to achieve secure, discreet, and accessible firearm storage. By meticulously planning for size, weight, and floor strength, carefully navigating the delivery, and crucially, anchoring the safe properly to the floor structure, you create a robust deterrent against theft and unauthorized access. Remember, the closet offers environmental benefits over garages, but be mindful of ventilation. Prioritize safety at every step, comply with all laws, and perform regular maintenance. A properly installed closet gun safe provides invaluable peace of mind, knowing your firearms are responsibly secured while remaining readily accessible when needed.
Related Post:
7 Best Vertical Gun Rack For Closet ( Great Gun Wall Mount Ideas )
Gun Safe Vs Gun Cabinet ( Which One You Should Buy )