If you carry a firearm for work or personal defense, you already know that control matters. As a trainer and gear tester, I’ve seen how the right holster can make the difference between a smooth, confident draw and a dangerous fumble. So, what is a retention holster and how does it work? In simple terms, it’s a holster designed to keep your handgun secure until you deliberately release it. A good retention holster balances speed, safety, and comfort. In this guide, I’ll break down how it works, what to look for, and how to choose one that fits your needs—without the fluff.
Exclusive Deals
Limited-time Exclusive Deals. Check current discount on Amazon.
Check Price on Amazon As an Amazon Associate I earn from qualifying purchases.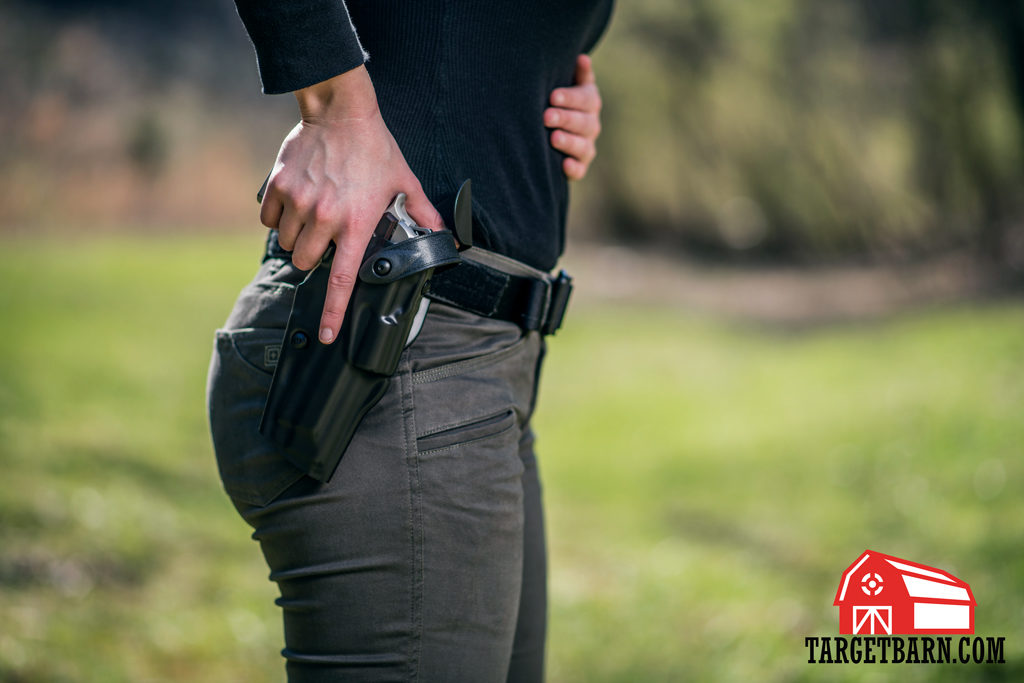
Source: www.targetbarn.com
What Is A Retention Holster?
A retention holster is a holster that uses built-in features to hold your gun in place until you use a specific action to release it. These features can be passive, like tight molding and friction, or active, like a button, lever, or hood you must move to draw. The goal is simple: prevent the gun from falling out or being taken by someone else, while still letting you draw on purpose.
You’ll see retention holsters used by law enforcement, security, and concealed carriers. Duty holsters often use multiple retention features. Concealed carry holsters tend to use lighter systems that favor speed and comfort.
Exclusive Deals
Limited-time Exclusive Deals. Check current discount on Amazon.
Check Price on Amazon As an Amazon Associate I earn from qualifying purchases.In testing, the best models keep the gun secure during running, grappling, sitting, and getting in and out of vehicles, yet release cleanly when you draw with proper technique. That balance is the heart of a great retention holster.

Source: www.youtube.com
How A Retention Holster Works
At a high level, it works in two steps: secure and release.
Step 1: Secure
Exclusive Deals
Limited-time Exclusive Deals. Check current discount on Amazon.
Check Price on Amazon As an Amazon Associate I earn from qualifying purchases.- The holster holds the gun using friction, shape locking, or a latch that grabs a fixed part of the gun, like the ejection port or trigger guard.
Step 2: Release
- You perform a simple motion during your draw to defeat the retention. This might be pressing a button with your thumb, pushing a lever, or sweeping a hood. When done right, it feels like one fluid motion with your draw stroke.
My field note: When I moved from a friction-only holster to a thumb-activated lock, my draw slowed down for a week. After 200 dry reps, my time matched my old draw, but my gun stayed put during sprints and clinch drills. That’s the pay-off.

Source: inside.safariland.com
Retention Levels Explained
You’ll hear terms like Level I, Level II, and Level III. These describe how many distinct retention features must be defeated to draw.
- Level I: One retention method. Often friction or a single strap.
- Level II: Two methods. Commonly a passive lock plus a manual release, like a hood or thumb lever.
- Level III: Three methods. Often an automatic lock at holstering, a rotating hood, and a separate manual release.
More levels can mean more security, but also more steps to draw. Agencies often require Level II or Level III for duty. Many concealed carriers choose Level I or Level II to keep the draw simple while still adding safety.
Source: www.reddit.com
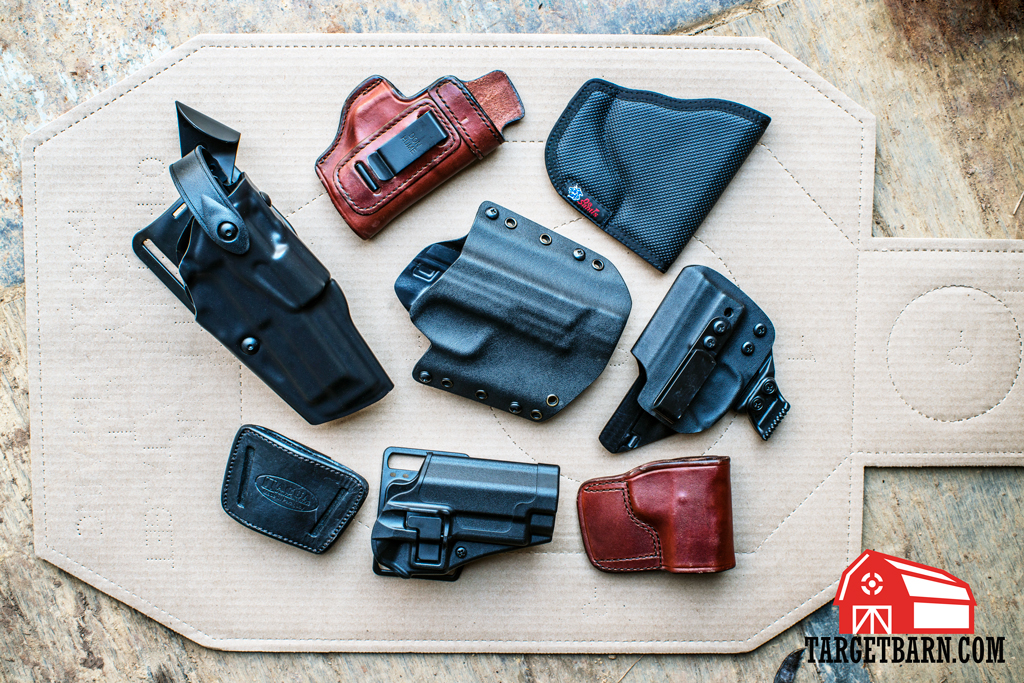
Types Of Retention Mechanisms
There are several common systems. Each has pros and cons.
- Passive friction and molding: The holster’s shape and tension screws grip the gun. Simple, fast, and quiet. Works well for concealed carry. Can lose tension if screws back out without maintenance.
- Thumb break strap: A leather or polymer strap snaps over the back of the slide. You break it with your thumb on the draw. Proven and reliable, but snaps can wear over time.
- Hood or SLS-style shroud: A rotating hood covers the back of the slide. You push or roll it forward with your thumb. Great for duty use and retention in fights.
- Ejection port/trigger guard lock: A cam or claw grabs the ejection port or trigger guard as you holster. You release it with a thumb lever during the draw. Secure and fast with practice.
- Internal wedge or lug systems: Less common, often brand-specific. They lock on contours of the slide or frame and release under a specific draw angle.
Pro tip from the range: Choose a system that works with your natural grip. If you fight your holster, you will fumble under stress. If the release lines up with your thumb as you build your master grip, you’re on the right track.

Source: norcalcarculture.com
Benefits And Trade-Offs
Benefits
– Better retention during movement, grappling, or crowded environments.
– Reduced risk of the gun falling out or being grabbed.
– Clear tactile feedback when holstering and drawing.
Trade-offs
- Learning curve. You must train the release until it’s automatic.
- More parts can mean more maintenance.
- Some designs add bulk or printing for concealed carry.
A simple way to decide: If your daily life involves close contact, public spaces, or duty work, bump retention up. If you carry deep concealment and prioritize a fast, clean draw with minimal bulk, a well-tuned Level I or II can be ideal.
Source: www.targetbarn.com
Fit, Draw, And Training Tips
– Set tension right: Use the holster’s screws to tune friction. The gun should click in and pull out with deliberate pressure, not a yank.
– Dry practice often: Start with an unloaded gun and confirm clear. Practice 5 to 10 minutes a day for a week. Focus on building your grip and defeating the release in one motion.
– Test in motion: Walk, jog, sit in a car, and kneel. Check for shifting, digging, or accidental release.
– Use a safe draw angle: Keep the muzzle downrange or at a safe angle during practice.
– Dress for your gear: Belts and clothing matter. A stiff belt keeps the holster from flexing and helps a smooth draw.
What I learned the hard way: A soft belt turns a great holster into a wobbly mess. Once I upgraded to a rigid belt, my draw smoothed out and my times dropped.
Choosing The Right Retention Holster
– Define your role: Duty, concealed carry, range, or competition. Duty often needs Level II or III. Concealed carry can favor Level I or II.
– Match your gun: Use model-specific holsters. Universal fits are convenient but often weak on retention.
– Pick carry position: AIWB, strong side, or duty drop. Some mechanisms are easier to use in certain positions.
– Check release ergonomics: The release should align with your thumb during your master grip.
– Consider environment: Heat, rain, and grit affect materials. Polymer and Kydex hold up well in wet or sandy conditions.
– Test before buying if possible: Try draws with safe training guns at a shop or class. If you can’t, buy from a seller with a good return policy.
Look for certifications and agency adoption where relevant. Designs that pass duty retention tests tend to be robust and proven in real-world use.
Maintenance And Safety Best Practices
– Inspect weekly: Look for cracks, worn edges, loose screws, and broken snaps.
– Use thread locker: A small drop on tension screws helps keep settings stable.
– Clean out debris: Dust, sand, and lint affect locks. Brush and wipe the inside channel.
– Confirm function after cleaning: Re-seat the gun and test the click or lock before carry.
– Train with gloves: If you wear gloves for work or winter, make sure you can still defeat the retention cleanly.
– Never modify the lock poorly: DIY grinding or trimming can create safety issues. If it doesn’t fit, get the right holster.
A quick routine after the range—wipe, inspect, re-tension—keeps your holster reliable when it counts.
Legal And Policy Considerations
– Know your local laws: Some areas have rules on open carry, concealed carry, and required security measures.
– Follow agency policy: Many departments mandate specific retention levels and approved models.
– Document your setup: For professional roles, record your holster model, retention level, and training.
– Keep training records: If your job involves armed work, training logs support your competence and policy compliance.
When in doubt, ask your department armorer, instructor, or a qualified attorney familiar with firearms law in your state.
Frequently Asked Questions Of What Is A Retention Holster And How Does It Work?
Is a Level II holster better than Level I?
Level II adds another layer of security over Level I. It is not always “better,” but it is more secure. Choose based on your environment and training commitment.
Will a retention holster slow my draw?
At first, maybe. With consistent dry practice, most shooters return to their normal draw time. Many end up more consistent because the grip and motion get cleaner.
Can I use a retention holster for concealed carry?
Yes. Many concealed carriers use friction plus a simple thumb release. Look for slim designs that reduce bulk and printing.
Do retention holsters damage the finish on my gun?
Any holster can cause wear over time. Kydex tends to mark high-contact areas. Proper fit, clean interiors, and light lubrication on contact points can reduce finish wear.
How do I know if my holster is too loose?
If the gun doesn’t “click” or seat firmly, or it shifts during movement, it’s too loose. Tighten tension screws until you feel a secure lock that still allows a smooth draw.
Are button-release holsters safe?
Yes, when designed well and used correctly. The release should be activated with proper thumb placement and a straight trigger finger. Train to avoid pressing near the trigger.
What belt should I use with a retention holster?
Use a rigid belt matched to the holster’s clip or loop size. A stiff belt keeps the holster stable, which helps both retention and draw speed.
Conclusion
A retention holster keeps your gun secure until you choose to draw. It does this through friction, locks, hoods, or a mix of systems tailored to your needs. Pick the right level, train the release until it’s second nature, and maintain your gear. That’s how you get both safety and speed.
Take the next step today: define your role, set your criteria, and test a few models with dry practice. Your future self will thank you. Have a question or a tip from your own experience? Drop a comment, subscribe for more guides, and keep learning.
Watch This Video on What is a retention holster and how does it work?