
I’ve spent years fitting holsters for concealed carriers, range students, and duty users. Here’s the simple answer you’re looking for: a retention level in holsters describes how many security features hold your handgun in place, and how hard it is for someone else to take it. In this guide, I’ll break down what that means, how levels are measured, and how to choose the right setup for your needs. If you want a reliable, clear take on what is a retention level in holsters, you’re in the right place.
Source: daraholsters.com
What A Retention Level Really Means
Retention is the force or mechanism that keeps a handgun seated in the holster until you make a proper draw. The “level” is a shorthand for how many active security steps stand between the gun and the outside world.
Think of it like doors in a hallway. A Level I holster is one locked door. A Level II adds a second lock. A Level III adds a third, and so on. More locks can slow a bad actor and keep the gun secure during movement, grappling, or a foot chase. But more locks can also slow your draw if you do not train for it.
Here’s the core idea:
- Passive retention uses friction or a molded detent. No extra motion needed to draw.
- Active retention uses a strap, hood, lever, or button that you must defeat before the gun clears the holster.
Your goal is to match the level to your risk, skill, and mission.

Source: www.youtube.com
How Retention Levels Are Classified
Industry players use slightly different labels, but the general framework looks like this:
- Level I: One retention feature. Often passive friction or a single strap. Common for concealed carry and range use.
- Level II: Two features. Often passive friction plus a strap, hood, or internal lock. Popular for uniformed security and open carry.
- Level III: Three features. Often hood plus internal lock plus tension. Standard for many patrol duty holsters.
- Level IV (less common): Four features. Used in high-risk, hands-on roles where gun grabs are a real concern.
A good rule: each “level” requires an independent, deliberate action to release. For example, a rotating hood plus a thumb lever counts as two actions. Friction alone counts as one. Some brands have formal test protocols that involve push-pull, rotational force, and timed draws by trained users. Those tests try to simulate real-world grabs and retention fights.
Source: daraholsters.com
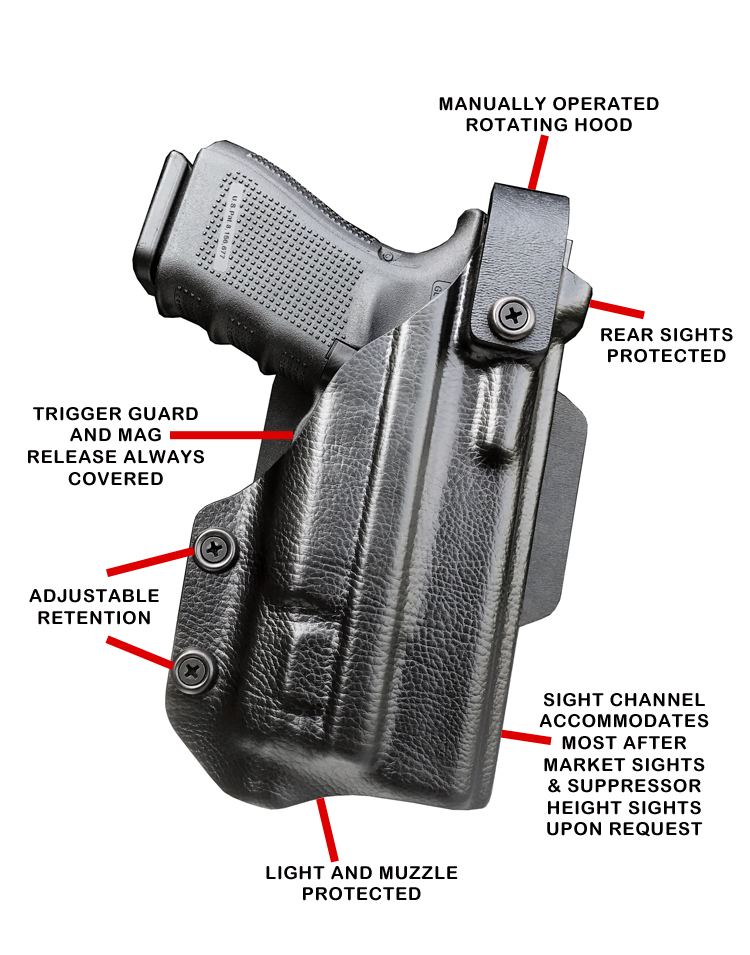
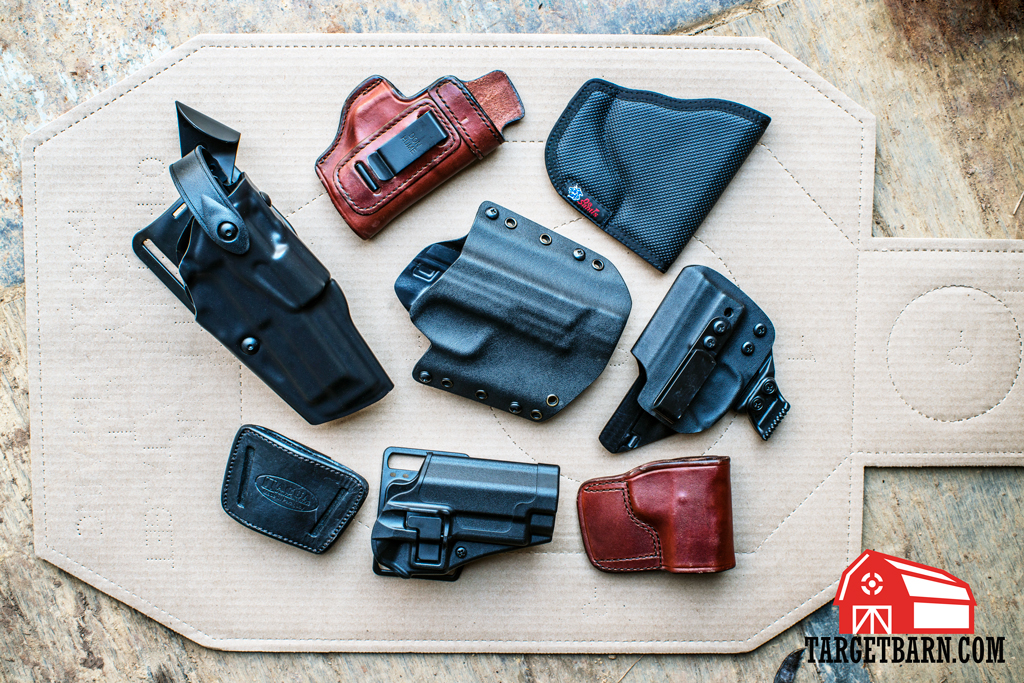
Common Retention Mechanisms You’ll See
You’ll run into several designs. Each has pros and cons.
- Passive friction or detent: Kydex clamps the trigger guard. Fast and simple. Great for concealed carry with tight belt tension.
- Thumb break strap: A leather or synthetic strap snaps over the back of the slide. Familiar to many. Needs break-in and regular checks.
- Rotating hood: A pivoting guard covers the rear of the slide. Open carry staple. Adds strong resistance to gun grabs.
- Internal locking lever: A device that locks the trigger guard or ejection port until you press a thumb button. Secure and fast with practice.
- ALS/SLS-style systems: Popular duty solutions combining a hood with an internal lock. Very secure once mastered.
Real-world note: I’ve watched new officers struggle with hoods the first week, then out-draw friction users after two weeks of reps. The mechanism is not the problem; practice is the bridge.
Source: www.targetbarn.com
Choosing The Right Retention Level For Your Use Case
Start with your environment and risk, then pick the level that fits.
- Concealed carry (low exposure): Level I is usually enough, as concealment itself reduces grab risk. Choose quality Kydex with solid belt support and a crisp click on the trigger guard.
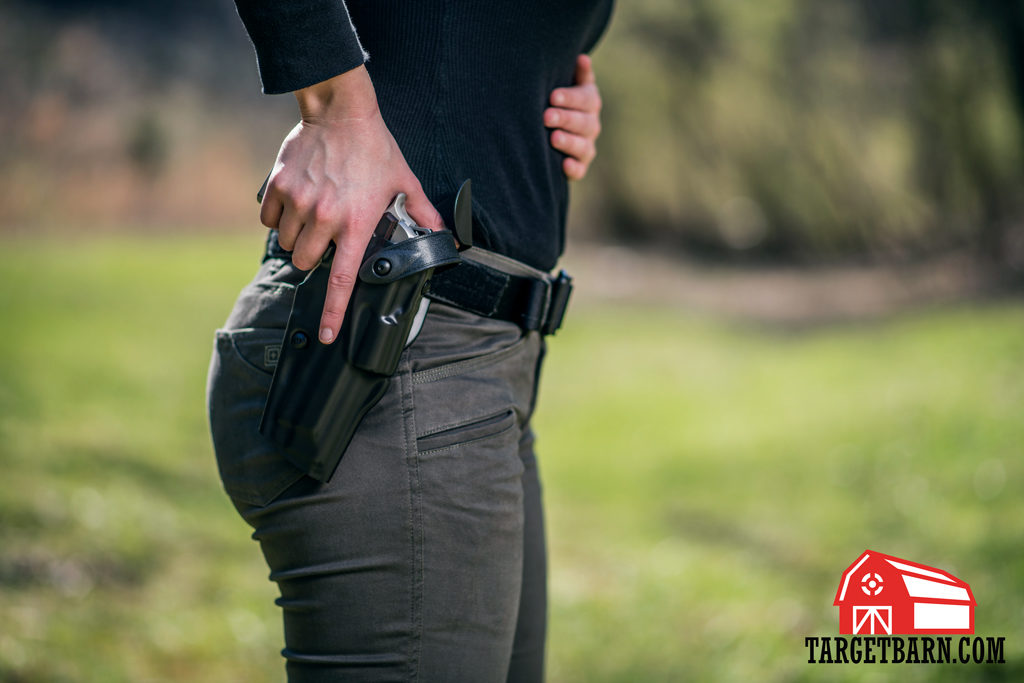
- Open carry in low-friction settings: Consider Level II. You want a thumb action or hood to counter casual grabs.
- Uniformed security or patrol: Level II or Level III is standard. Policies often mandate this. Select a system supported by your training unit.
- Specialized or high-risk duties: Level III or Level IV. Prioritize systems with documented test data and widespread agency support.
Fit and comfort matter too:
- Ensure the holster fully covers the trigger guard.
- Check ride height and cant. Even perfect retention fails if the draw angle fights your wrist.
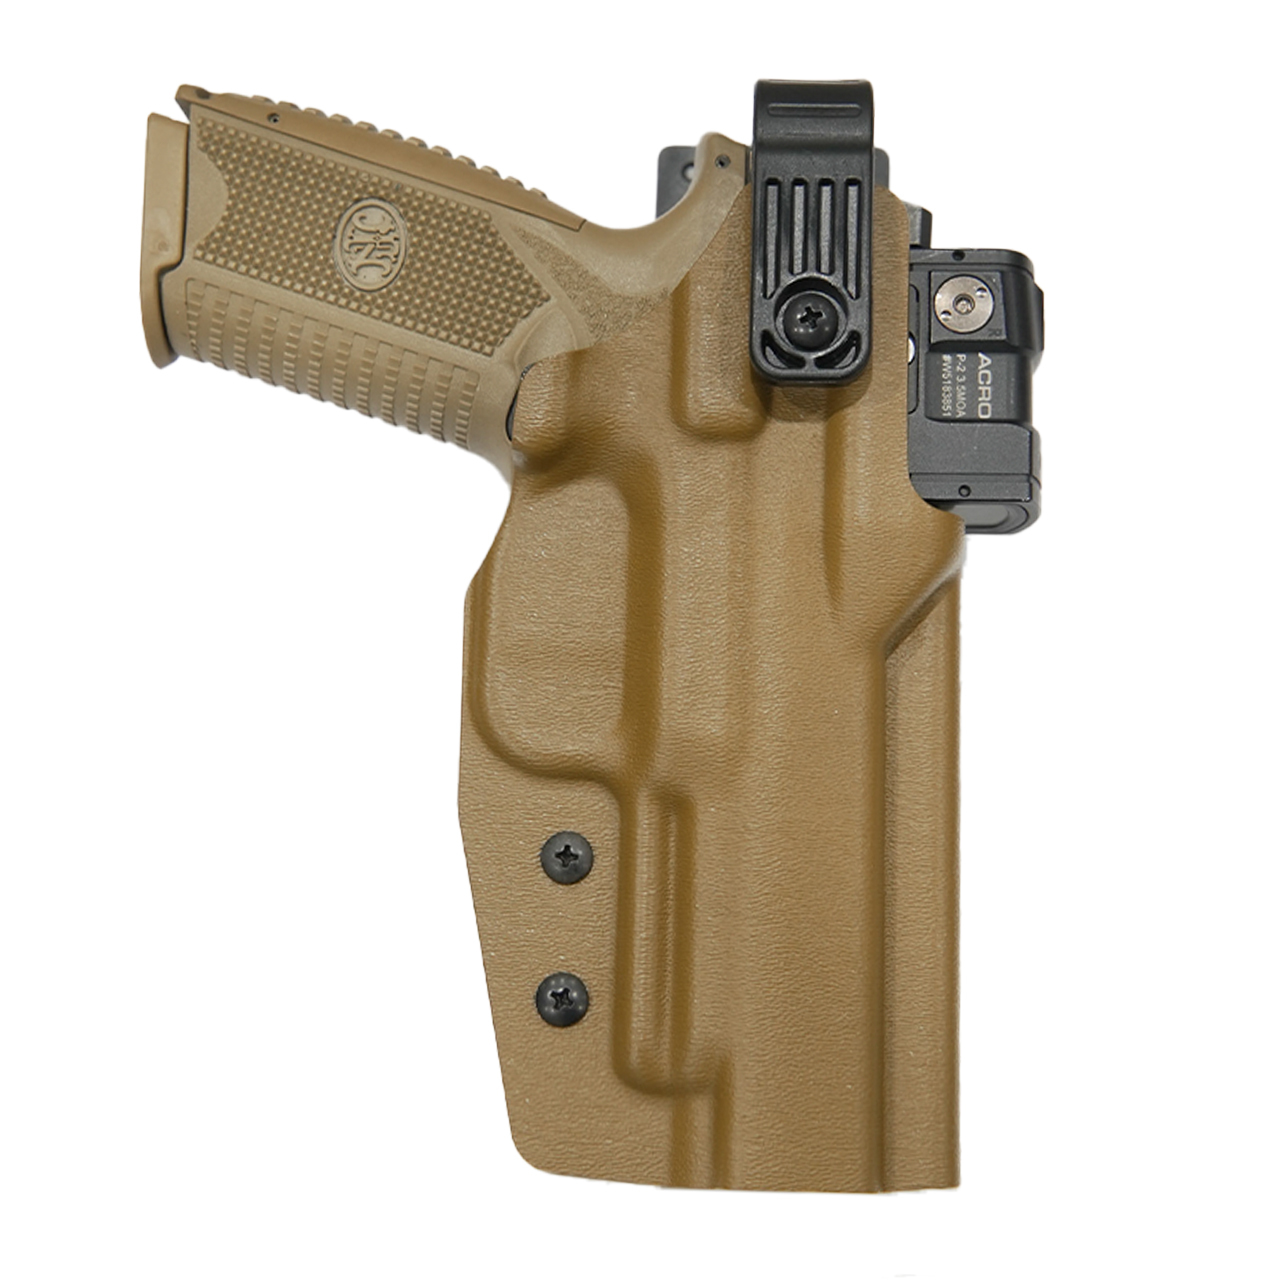
- Confirm compatibility with optics, lights, and compensators. Accessory fit can change retention function.
Pro tip from the field: If your holster makes you adjust your grip during the draw, it is the wrong setup or the wrong cant. Fix that first.

Source: inside.safariland.com
Testing, Adjustment, And Training
Don’t guess. Test your retention on day one and after every change.
Simple tests you can do safely with an unloaded gun:
- Shake test: Hold the empty holster upside down with the gun inserted and give a few firm shakes. It should not fall out if the holster promises Level I or higher.
- Push-pull test: With the holster on a rigid belt, have a partner apply gentle but firm tugs from different angles while you keep the gun seated. Increase force slowly.
- Movement test: Jump, run, and kneel. The gun should stay put.
Adjustment tips:
- Tension screws: Turn in small quarter turns and re-test. Blue thread locker helps hold settings.
- Straps and hoods: Inspect snaps, pivots, and springs. Replace worn parts early.
- Draw practice: Use dry fire with safe conditions. 5–10 minutes a day builds the muscle path for defeating each feature in one clean motion.
Training milestones to aim for:
- Clean draw to first sight picture in under 1.5 seconds from concealment with Level I.
- Clean draw in under 2.0 seconds with Level II or III, using duty gear.
- Zero fumbles on the first motion that defeats your primary lock.
I learned the hard way that “almost right” tension turns into “way wrong” in a parking lot scuffle. Set it right, then confirm with reps.

Source: www.youtube.com
Care And Maintenance That Protects Retention
Retention fails when small parts fail. Keep it simple and regular.
- Inspect weekly: Look for cracks, loose screws, frayed straps, weak snaps, and worn hoods.
- Clean monthly: Remove lint, sand, and grit. Use a soft brush and mild soap on polymer. Wipe metal parts and add a tiny drop of light oil where specified.
- Re-mold concerns: Heat and Kydex do not mix. Avoid hot car dashboards. Warped shells lose detent.
- Belt and mount: A flimsy belt ruins retention. Use a rigid belt sized for your loops or duty mount.
If your holster ever releases the gun when turned upside down and shaken (and it claims more than bare friction), retire it or repair it.
Source: www.targetbarn.com
Legal And Policy Notes
Policy and law can drive your choice as much as preference.
- Agency rules: Many agencies mandate Level II or Level III for uniformed carry. Always confirm the exact models approved.
- Venue restrictions: Some events or workplaces require active retention for open carry.
- Civil liability: A preventable gun grab is a serious risk. Higher retention, backed by training, helps show due diligence.
No single level is “best” for everyone. Your choice should be defensible, documented, and aligned with your environment and training.
Source: muddyrivertactical.com
Frequently Asked Questions Of What Is A Retention Level In Holsters?
Is A Higher Retention Level Always Better?
No. Higher levels add security but can slow the draw if you do not train. Match the level to your risk, carry style, and skill.
What’s The Difference Between Passive And Active Retention?
Passive uses friction or a molded detent and needs no extra motion. Active uses a strap, hood, or lock that you must defeat before drawing.
Can I Conceal Carry With A Level II Holster?
Yes, if the holster’s bulk and release method work with your cover garment. Test the draw from seated, standing, and while moving.
How Often Should I Replace A Retention Holster?
Replace it when cracks form, parts loosen and won’t hold, or retention changes after you set it. Many users replace duty holsters every few years with heavy use.
Does A Weapon Light Or Optic Affect Retention?
Yes. Lights and optics change holster fit and how locks engage. Use a holster made for your exact setup, then re-test tension.
What Tests Prove A Holster’s Retention Level?
Industry tests use measured push-pull force, rotation, and timed draws. For end users, do safe shake tests, partner tugs, and movement drills.
Conclusion
Retention levels tell you how secure your holster is and how much training you need to draw fast. Pick the level that fits your world: concealed carriers often use Level I, while open carry and duty roles lean Level II or III. Test your gear, adjust it, and train until every release is smooth and safe. The right holster, set up well, becomes invisible until the moment you need it.
Ready to go deeper? Try the tests above this week, then share your results or questions in the comments. Subscribe for more gear guides and training tips.
Watch This Video on What is a retention level in holsters?
