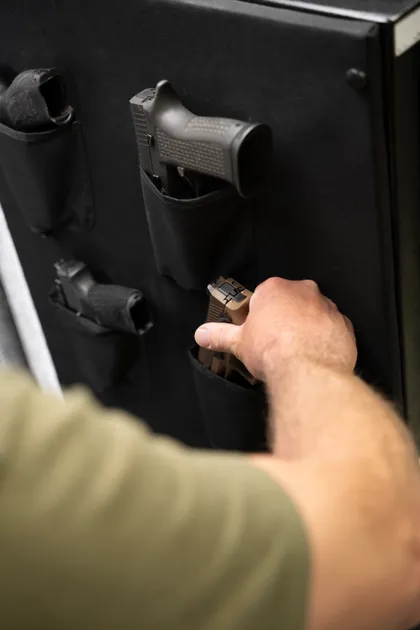
Keeping your gun cabinet clean is more important than you might think. Dust, dirt, and moisture can damage your firearms and make your cabinet less secure over time.
If you want to protect your valuable guns and keep them in top condition, knowing how to clean your gun cabinet properly is essential. You’ll discover simple steps to make your cabinet spotless and safe. Stick with me, and by the end, you’ll have the confidence to maintain your gun storage like a pro.
Ready to start? Let’s dive in.
Gather Cleaning Supplies
Gathering the right cleaning supplies is the first step in cleaning a gun cabinet. Having everything ready saves time and helps you clean effectively. It also protects the cabinet and your firearms from damage.
Focus on getting supplies that are safe for wood, glass, and metal surfaces. Avoid harsh chemicals that can harm the cabinet finish or gun parts.
Soft Cloths And Microfiber Towels
Use soft cloths to wipe dust and dirt gently. Microfiber towels work well because they trap dust without scratching. Avoid rough fabrics that can leave marks.
Mild Cleaning Solution
Choose a mild cleaning solution made for wood or glass surfaces. A mix of water and a small amount of dish soap works fine. Strong chemicals can damage the cabinet’s finish.
Glass Cleaner
For glass doors or panels, use a glass cleaner that leaves no streaks. Spray it on the cloth, not directly on the glass. This prevents drips inside the cabinet.
Soft Brush Or Compressed Air
A soft brush helps remove dust from tight corners and crevices. Compressed air can blow out dust from hard-to-reach places. Both tools keep the cabinet clean without scratches.
Protective Gloves
Wear protective gloves to keep oils from your hands off the surfaces. Gloves also protect your skin from cleaning chemicals. Choose nitrile or latex gloves for best results.
Gun Oil Or Lubricant
Have gun oil or lubricant ready for cleaning firearms stored inside. This keeps metal parts from rusting and ensures smooth operation. Use it sparingly and carefully.
Empty The Cabinet
Emptying the gun cabinet is the first step in cleaning it safely and effectively. Removing all guns and items clears the space for a thorough cleaning. It also ensures no damage occurs to your firearms during the process.
Take your time handling each item carefully. Treat every gun as if it is loaded. Safety is the highest priority in this step.
Prepare A Safe Area For Your Firearms
Find a clean, flat surface to place your guns temporarily. Use a soft cloth or gun mat to protect them. Keep the area free from distractions to stay focused and safe.
Remove All Guns From The Cabinet
Open the cabinet slowly and check for any locked compartments. Unlock them before taking out guns. Lift each firearm gently and place it in the prepared safe area.
Take Out All Accessories And Ammunition
Remove all extra items like cleaning kits, scopes, and ammo boxes. Store ammunition separately in a safe, dry place. Organizing these items helps prevent mix-ups and damage.
Check For Any Hidden Items
Look behind and under shelves for forgotten items. Remove all objects to avoid cleaning around them. A clear cabinet allows for a better, deeper clean.
Dust And Vacuum Interior
Cleaning the inside of a gun cabinet is important for keeping your firearms safe. Dust and dirt can build up over time and cause damage. Dusting and vacuuming the interior removes these particles. This simple step helps protect your guns from scratches and rust. It also keeps the cabinet looking neat.
Remove All Firearms And Accessories
Take out every gun and accessory before cleaning. This gives full access to the cabinet’s interior. Handle firearms carefully and place them in a safe spot. Remove any ammo or cleaning supplies too. Empty space makes dusting and vacuuming easier.
Use A Soft Cloth Or Duster
Start by wiping surfaces with a soft cloth or duster. Choose a cloth that does not shed fibers. Lightly dust shelves, walls, and corners. Pay attention to hard-to-reach spots. This removes loose dust without scratching surfaces.
Vacuum With A Brush Attachment
Select a vacuum with a brush tool to clean corners and crevices. The brush loosens dirt while vacuuming it away. Use low suction to avoid damage. Move the tool gently across all surfaces. This clears out dust trapped in tight areas.
Check And Clean Air Vents
Check any air vents inside the cabinet. Dust often collects there and blocks airflow. Vacuum vents carefully using the brush attachment. Clean vents help keep the cabinet dry and fresh. This prevents moisture buildup and protects guns.

Clean Glass Panels
Cleaning the glass panels of a gun cabinet keeps the display clear and attractive. Dust, fingerprints, and smudges can build up quickly. Regular cleaning helps maintain a neat and safe environment for your firearms.
Use gentle methods to avoid scratches or damage. Proper care preserves the glass’s shine and transparency.
Choose Suitable Cleaner
Select a cleaner made for glass surfaces. Avoid harsh chemicals that can damage or cloud the glass. A mild glass cleaner or a solution of water and vinegar works well. Test the cleaner on a small area first. Use a soft cloth or microfiber towel to apply the cleaner. This prevents scratches and removes dirt effectively.
Avoid Streaks And Smudges
Wipe the glass in a circular motion to clean evenly. Use a dry, lint-free cloth to polish the glass after cleaning. Avoid using paper towels, which can leave fibers behind. Clean on a cloudy day or in a shaded area. This reduces quick drying and streak marks. Take your time to ensure the glass looks spotless and clear.
Wipe Down Shelves And Surfaces
Cleaning your gun cabinet starts with wiping down all shelves and surfaces. Dust and dirt can build up over time. This buildup can damage your guns or cabinet. Keeping surfaces clean helps protect your collection. Take time to clean every corner carefully. Use the right tools and products for safety and best results.
Select Safe Cleaning Products
Choose cleaning products that are gentle and safe for wood and metal. Avoid harsh chemicals that can harm finishes or cause rust. Look for mild soap or products made for furniture and gun cabinets. Test any product on a small, hidden area first. This step prevents damage to the cabinet’s surface.
Use Soft Cloths Or Brushes
Use soft cloths to wipe down shelves and surfaces. Microfiber cloths work well because they trap dust without scratching. For tight corners or crevices, use a soft brush. A small paintbrush or makeup brush can reach hard spots. Avoid abrasive materials that can scratch or damage surfaces. Wipe gently and regularly to keep your cabinet clean.
Treat Rust And Stains
Treating rust and stains is important to keep your gun cabinet safe and looking good. Rust can damage metal parts and make the cabinet weak. Stains may spoil the finish and attract dirt. Cleaning these spots early helps protect your cabinet for years.
Use the right tools and products. Be gentle to avoid scratching or harming the surface. Protect your hands and work in a well-ventilated area. Let’s see how to find and remove rust safely.
Identify Rust Spots
Look closely at metal parts inside and outside the cabinet. Rust appears as reddish-brown or orange patches. It may feel rough or flaky. Check corners, hinges, and edges where moisture collects. Light stains may be easier to clean than deep rust. Mark all spots before cleaning to avoid missing any.
Apply Rust Remover Safely
Choose a rust remover made for metal surfaces. Follow the instructions on the label carefully. Wear gloves to protect your skin. Apply the remover with a soft cloth or brush. Do not use too much liquid to avoid damage.
Let the remover sit for the time suggested. Wipe the area clean with a damp cloth. Dry thoroughly to stop rust from returning. Repeat if needed but avoid over-scrubbing the metal. Finish by applying a light oil or rust protector to keep metal safe.
Clean Locks And Hinges
Cleaning the locks and hinges of your gun cabinet helps keep it secure and working well. Dirt and dust can build up over time. This buildup can make locks stick and hinges squeak. Regular care prevents rust and damage. It also ensures smooth opening and closing of the cabinet.
Lubricate Moving Parts
Apply a small amount of lubricant to the locks and hinges. Use a lubricant made for metal parts. Avoid overusing oil, which can attract dirt. Move the lock or hinge back and forth to spread the lubricant. This keeps parts moving smoothly and stops squeaks.
Check For Damage
Inspect locks and hinges for signs of wear or damage. Look for rust, cracks, or loose screws. Replace damaged parts to maintain security. Tighten screws to keep hinges stable. Early repairs prevent bigger problems later.
Dry And Ventilate Cabinet
After cleaning, drying and ventilating the gun cabinet is essential. Moisture inside the cabinet can cause rust and damage your firearms. Proper drying keeps the cabinet safe and preserves your guns for years.
Drying removes any leftover dampness from cleaning or humidity. Ventilation allows fresh air to flow, reducing moisture buildup. Both steps help maintain a dry and secure environment inside the cabinet.
Remove Excess Moisture
Use a soft, dry cloth to wipe all surfaces. Focus on corners and crevices where water hides. Avoid using paper towels that can leave fibers behind. Make sure no wet spots remain before closing the cabinet.
Use Silica Gel Packs
Place silica gel packs inside the cabinet. These absorb moisture and keep air dry. Replace them regularly to maintain effectiveness. Silica gel helps prevent rust and mold inside the cabinet.
Allow Air Circulation
Leave the cabinet door open for several hours after cleaning. This allows fresh air to circulate. Airflow helps dry hidden damp areas. Avoid closing the cabinet until completely dry.
Choose A Dry Location
Place the gun cabinet in a dry room. Avoid basements or areas with high humidity. A dry location reduces moisture risks. Use a dehumidifier if needed to control humidity levels.
Replace Items Carefully
Replacing items in your gun cabinet requires care and attention. Proper placement keeps your cabinet safe and functional. It also helps you find items quickly when needed.
Organize For Accessibility
Place frequently used items at eye level. Store less used items on higher or lower shelves. Keep similar items together for easy access. This method saves time and reduces clutter.
Inspect Items Before Storing
Check each item for dirt, rust, or damage before placing it back. Clean or repair items if needed. Avoid storing dirty or faulty equipment. This protects your cabinet and keeps items in good condition.


Frequently Asked Questions
How Often Should I Clean My Gun Cabinet?
Clean your gun cabinet every 3 to 6 months. Regular cleaning prevents dust buildup and protects your firearms from moisture damage.
What Materials Are Safe For Cleaning Gun Cabinets?
Use a soft cloth, mild soap, and water. Avoid harsh chemicals that can damage the cabinet’s finish or harm your firearms.
Can I Use Oil To Maintain My Gun Cabinet?
No, avoid using oil on the cabinet surface. Instead, use oil only on firearms to prevent rust and corrosion, not on the cabinet.
How Do I Prevent Moisture Inside A Gun Cabinet?
Place moisture absorbers or silica gel packs inside. Good ventilation and regular cleaning also help reduce humidity and protect your guns.
Conclusion
Cleaning your gun cabinet keeps it safe and looking good. Regular care stops dust and rust from building up. Use gentle cleaners and soft cloths to protect surfaces. Check locks and hinges for smooth use. Simple steps make a big difference in gun cabinet upkeep.
Keep your firearms stored in a clean, secure place. A little effort goes a long way to protect your gear. Stay consistent and your cabinet will last many years. Safe storage means peace of mind every day.

