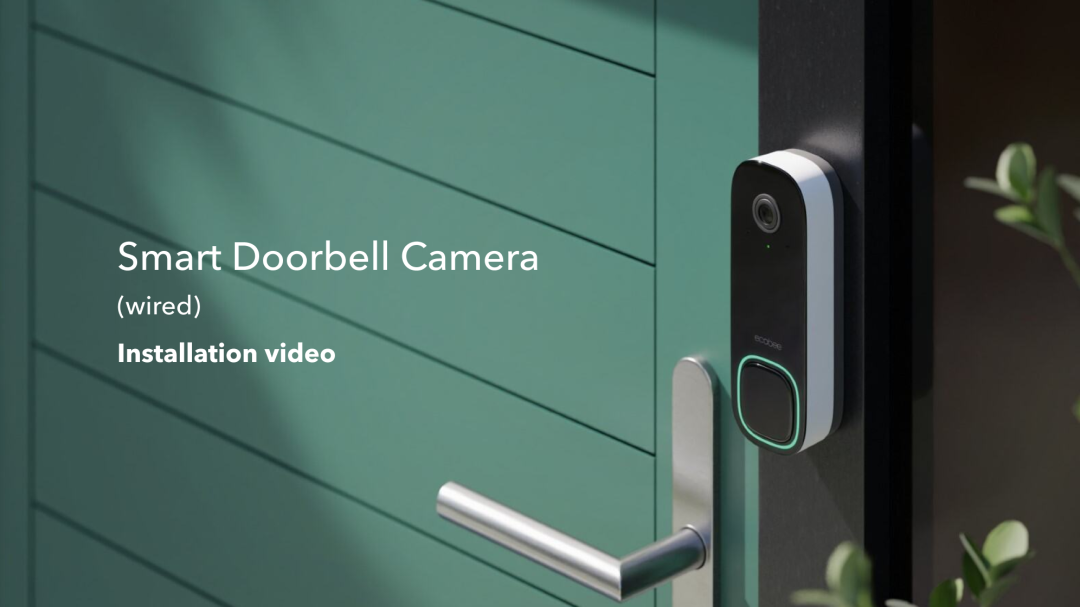
Installing a doorbell camera can change how you see your home’s security. With a doorbell camera, you can know who is at your door, talk to visitors, and watch for packages—all from your phone. Whether you are renting or own your home, installing a doorbell camera is easier than you might think.
Exclusive Deals
Limited-time Exclusive Deals. Check current discount on Amazon.
Check Price on Amazon As an Amazon Associate I earn from qualifying purchases.Still, the process needs some planning and attention to detail. If you’re new to home improvement, don’t worry. This guide will walk you through every step, share practical tips, and help you avoid common mistakes. Soon, you’ll have extra peace of mind and a smarter front door.
Understanding Doorbell Cameras
Before you start, it helps to know what a doorbell camera is and how it works. A doorbell camera is a small device you install near your door in place of (or next to) your old doorbell. It has a camera, a button for visitors, and usually a microphone and speaker. When someone presses the button or comes close, the camera turns on. You get a notification on your phone, and you can see or talk to your visitor.
Doorbell cameras are part of the growing world of smart home security. They can record video, store footage in the cloud or on a memory card, and even connect to smart assistants like Alexa or Google Home. Some models work on batteries, while others need to be wired into your old doorbell’s power.
Types Of Doorbell Cameras
You’ll find two main types:
Exclusive Deals
Limited-time Exclusive Deals. Check current discount on Amazon.
Check Price on Amazon As an Amazon Associate I earn from qualifying purchases.- Wired doorbell cameras – These use your existing doorbell wiring for power. They offer continuous power, so you don’t worry about changing batteries, but installation takes more effort.
- Wireless (battery-powered) doorbell cameras – These run on rechargeable batteries. They’re easier to install, but you need to recharge or replace the battery every few months.
There are also differences in features like video quality (720p, 1080p, or even 2K/4K), field of view (how much area the camera can see), and whether they have night vision, motion detection, or two-way audio.
Why Install A Doorbell Camera?
- Increased security: See who’s at the door before opening it.
- Package protection: Watch for deliveries and prevent theft.
- Convenience: Talk to visitors when you’re not home.
- Evidence: Record visitors or incidents for later.
Surveys show that homes with visible cameras are much less likely to be targeted by burglars. In fact, a 2022 study by the International Association of Chiefs of Police found that over 60% of burglars would avoid homes with visible cameras.
What You Need Before Installing
A smooth installation starts with good preparation. Here’s what to gather:
- Your chosen doorbell camera (make sure it fits your needs and doorframe)
- Screwdriver (usually Phillips head)
- Drill (for new holes, if needed)
- Level (to keep the camera straight)
- Smartphone or tablet (for setup)
- Wi-Fi network (strong signal at your door)
- Wire strippers (for wired models)
- Anchors and screws (usually included)
- Chime kit (sometimes needed for wired models)
- Ladder (if your doorbell spot is high)
Checking Compatibility
For wired models, check your home’s existing doorbell wiring and voltage. Most doorbell cameras need 16-24 volts AC. If you have an old chime box, you might need an adapter. Battery-powered models avoid this issue.
Wi-fi Signal Strength
A weak Wi-Fi signal is the #1 reason doorbell cameras work poorly. Use a free app to check signal strength near your door. You want at least -60 dBm for smooth video and notifications. If your signal is weaker, consider a Wi-Fi extender.
Exclusive Deals
Limited-time Exclusive Deals. Check current discount on Amazon.
Check Price on Amazon As an Amazon Associate I earn from qualifying purchases.Step-by-step Guide To Installing A Doorbell Camera
Now for the main event: installing your doorbell camera. The exact steps depend on your camera type, but the basics are similar.
1. Unbox And Read The Instructions
Before you touch your old doorbell, open your new camera and read the manual. Every brand (like Ring, Nest, or Arlo) is a little different. Look for details about power, app setup, and mounting.
2. Charge Or Prepare The Camera
If you have a battery-powered camera, fully charge it first. Some models need a few hours to charge.
For wired models, turn off the power at your breaker box before touching any wires. Test the doorbell to make sure the power is off.
3. Remove Your Old Doorbell (wired Models)
Use your screwdriver to take off your old doorbell button. Keep the wires from falling back into the wall. If the wires are dirty or have old paint, clean them with a cloth. If you see only one wire or no wires, you may need professional help or a battery-powered model.
4. Attach The Mounting Bracket
Most cameras come with a mounting bracket. Hold the bracket to your wall where you want the camera. Use a level to keep it straight. Mark the screw holes with a pencil.
If you’re drilling into wood, you can screw directly. For brick, stucco, or concrete, drill pilot holes and use wall anchors. Then, screw the bracket into place.
Battery-powered models may use strong adhesive strips instead of screws. Only use these if your wall is smooth and flat.
5. Connect The Wires (wired Models Only)
If your camera is wired, connect the two wires from your old doorbell to the screws or clips on the new doorbell. It doesn’t matter which wire goes to which screw, as doorbells use AC power. Tuck the wires behind the bracket.
If your camera needs a chime kit or power adapter, follow the manual to install it inside your old chime box. This step helps deliver steady power and keeps your chime working.
6. Mount The Doorbell Camera
Snap or screw the camera onto the bracket. Most cameras have security screws at the bottom. Tighten them with the included tool to prevent theft.
7. Restore Power And Test
Turn the power back on at your breaker. For battery models, insert the charged battery.
The camera’s light should turn on, showing it has power.
8. Set Up The Camera In The App
Download the brand’s app on your phone. Create an account if you don’t have one. Scan the QR code on the camera or follow the prompts to add your new device.
Connect the camera to your Wi-Fi. Follow the app’s steps to name your camera, set your preferences (like motion alerts or video quality), and test the live view.
9. Adjust The Camera Angle
Many doorbell cameras let you tilt or rotate them for the best view. Check the live feed on your phone and adjust until you can clearly see faces and packages. Avoid pointing the camera too high (you’ll see only hats) or too low (just shoes and doormats).
10. Test All Features
Press the doorbell and check that your phone gets an alert. Try talking through the app. Walk in front of the camera to test motion detection. Make sure night vision works by checking the view after dark.
Wired Vs. Wireless: Which Is Better For You?
Choosing between wired and wireless (battery-powered) cameras depends on your home and your needs. Here’s a quick comparison:
| Feature | Wired Doorbell Camera | Wireless Doorbell Camera |
|---|---|---|
| Power Source | Existing doorbell wiring | Rechargeable battery |
| Installation Difficulty | Medium (needs wiring) | Easy (no wiring needed) |
| Maintenance | Low (no battery changes) | Battery recharging every 2-6 months |
| Video Uptime | Continuous (no battery limits) | Limited by battery life |
| Best for | Homes with existing wired doorbells | Apartments, renters, or homes without wiring |
Non-obvious Insight 1
Some people think wireless cameras are less secure, but most use encrypted Wi-Fi connections and have tamper alarms. However, if you forget to recharge, you could miss important footage. Set reminders to check battery life monthly.
Where To Install Your Doorbell Camera
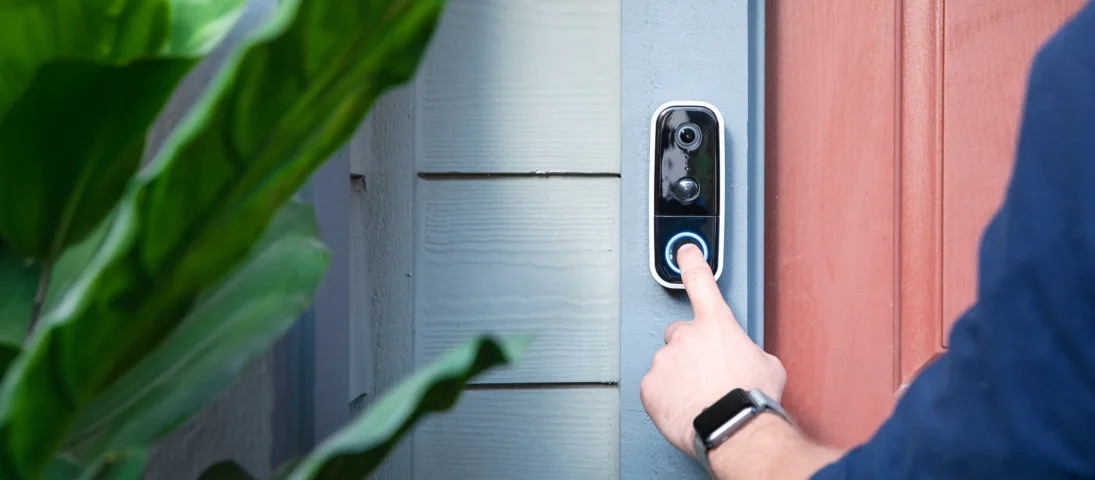
Location matters. A doorbell camera should be about 48 inches (122 cm) above the ground—this is the average chest height for adults and gives a clear view of faces and packages. Don’t place the camera behind a screen door or thick glass, as this can block motion sensors and blur the video.
If your door is in a shaded area, avoid pointing the camera directly at bright light or sun, which can cause glare. If your entryway is very dark, consider adding a porch light.
Comparing Placement Options
| Location | Pros | Cons |
|---|---|---|
| Next to door, chest height | Best face view, easy access | May need to reroute wiring |
| Above door, eye level | Wider field of view | Harder to reach for visitors |
| On door frame | Easy install, good for renters | Limited view if door opens inward |
Non-obvious Insight 2
If you live in a townhouse or a busy apartment hall, check building rules before installing. Some buildings do not allow cameras in shared spaces for privacy reasons. Also, if your door faces a neighbor, angle your camera to avoid filming their door.
Setting Up Smart Features
Once your camera is installed, you can make it smarter by using the app settings. Most doorbell cameras offer:
- Motion detection: Get alerts only when someone approaches your door, not every time a car passes.
- Privacy zones: Block certain areas from being recorded (for example, a neighbor’s window).
- Two-way audio: Talk to visitors, delivery people, or even scare off suspicious people.
- Video storage: Save clips to the cloud or a memory card. Some brands offer free storage, but most charge a monthly fee for more features.
Tips For Smarter Alerts
- Lower the motion sensitivity if you get too many false alarms.
- Set “activity zones” so the camera only notifies you about movement near your door.
- Some cameras can recognize familiar faces or packages, reducing unwanted alerts.
Troubleshooting Common Problems
Most doorbell camera issues are simple to fix. Here are solutions to common problems:
Weak Wi-fi Signal
If your video is choppy or you get delayed alerts, the camera may be too far from your router. Try these fixes:
- Move your router closer to the door.
- Add a Wi-Fi extender.
- Use a mesh Wi-Fi system for larger homes.
Power Problems (wired Models)
If your camera keeps turning off or you hear buzzing from your chime, check:
- Is your transformer the right voltage (16-24V)?
- Are the wires tightly connected?
- Did you install the included chime kit or adapter?
If your chime no longer works, check the manufacturer’s FAQ or call support.
Battery Drains Too Fast (wireless Models)
If your battery lasts only a few weeks:
- Lower the video quality in the app.
- Reduce motion sensitivity.
- Turn off live viewing when not needed.
Video Quality Is Poor
For blurry or laggy video:
- Clean the camera lens with a soft cloth.
- Check your Wi-Fi speed (you need at least 2 Mbps upload for HD video).
- Adjust your camera angle to avoid direct sunlight.
Camera Not Responding
If the camera won’t turn on or connect:
- Restart the camera (remove and replace the battery, or use the reset button).
- Check for app or firmware updates.
- Try reinstalling the camera in the app.
Security And Privacy Tips
A doorbell camera protects your home—but only if you protect the camera itself. Follow these best practices:
- Change the default password for your camera account.
- Turn on two-factor authentication in the app.
- Update firmware regularly to get security patches.
- Only share video clips with trusted people.
- Check local laws about recording audio—some states require consent to record conversations.
According to the Federal Trade Commission, over 50% of smart home device hacks happen because users leave the default password or don’t update software. Taking these small steps keeps your footage and family safe.
Comparing Top Brands
The market for doorbell cameras is crowded. Here’s a quick look at some leading brands and their standout features:
| Brand | Video Quality | Storage | Works With | Price Range |
|---|---|---|---|---|
| Ring | 1080p | Cloud (paid) | Alexa, Google | $60–$250 |
| Nest (Google) | 1080p/2K | Cloud (paid) | Google Home | $100–$230 |
| Arlo | 2K/4K | Cloud (paid), local | Alexa, Google, HomeKit | $130–$250 |
| Eufy | 2K | Local, cloud (optional) | Alexa, Google | $90–$200 |
For more details and reviews, you can also check resources like Consumer Reports.
Common Mistakes To Avoid
- Not checking Wi-Fi strength before buying
- Skipping the power check on wired models (wrong voltage causes issues)
- Mounting too high or too low—misses faces or packages
- Forgetting to update firmware—can leave your camera open to hacks
- Ignoring privacy laws—recording audio without consent can be illegal in some places

Final Thoughts
Installing a doorbell camera is one of the easiest ways to upgrade your home’s security and convenience. With a bit of planning, the right tools, and careful setup, most people can finish the job in under an hour. Don’t rush—take time to check compatibility, pick the best spot, and set up smart features.
Soon, you’ll feel more secure and connected to your home, no matter where you are. Remember, the little details—like password safety and camera angle—make a big difference in how well your doorbell camera works.
Frequently Asked Questions
What If My Home Doesn’t Have Existing Doorbell Wiring?
You can use a battery-powered doorbell camera. These models do not need wires and can be installed almost anywhere. Just charge the battery before mounting, and follow the same setup steps. For renters or those in older homes, this is usually the best choice.
How Long Does The Battery Last On Wireless Doorbell Cameras?
Most batteries last 2 to 6 months per charge, depending on how often the camera records. Cold weather and frequent motion alerts can shorten battery life. Check the app for battery status and set a reminder to recharge before it runs out.
Can I Use A Doorbell Camera In An Apartment?
Yes, but check with your landlord or building management first. Many battery-powered models use adhesive mounts, so you don’t drill holes. Make sure the camera does not record shared hallways or neighbors, as this could break building rules or privacy laws.
Do Doorbell Cameras Work At Night?
Yes, most doorbell cameras have infrared night vision. This lets you see visitors and packages even in total darkness. For the best results, keep the camera lens clean and avoid pointing directly at bright lights.
Will My Existing Doorbell Chime Still Work?
If you use a wired doorbell camera and follow instructions, your chime should work. Some brands require a special chime kit or adapter, which is often included. If your chime stops working, check the wiring and the manufacturer’s troubleshooting guide.