Thinking about installing a home alarm system by yourself? You’re not alone. Many homeowners want better security but worry about costs, complexity, or letting strangers into their homes. The good news is, with modern technology, DIY alarm systems are more accessible than ever. But before you rush into it, it’s smart to ask: can you really do it yourself? What are the challenges, and is it always the right choice?
Exclusive Deals
Limited-time Exclusive Deals. Check current discount on Amazon.
Check Price on Amazon As an Amazon Associate I earn from qualifying purchases.This guide will walk you through everything you need to know about installing a home alarm system on your own. You’ll learn the pros and cons, what skills you need, which systems are easiest, and practical steps for a smooth setup.
By the end, you’ll know if DIY is right for you—or if calling a professional makes more sense.
Understanding Home Alarm Systems
A home alarm system is a network of devices designed to detect intruders and alert you or a monitoring service. Most systems include sensors, a control panel, sirens, and sometimes cameras or smart home integration. There are two main types: wired systems and wireless systems.
Wired Vs. Wireless: What’s Easier For Diy?
Wired systems usually require running cables inside your walls. This process can be complex, especially in finished homes, and often needs drilling, fishing wires, and electrical knowledge. Wireless systems use batteries and communicate over radio waves or Wi-Fi, making them much simpler to install.
Exclusive Deals
Limited-time Exclusive Deals. Check current discount on Amazon.
Check Price on Amazon As an Amazon Associate I earn from qualifying purchases.Here’s a quick comparison:
| Feature | Wired Systems | Wireless Systems |
|---|---|---|
| Installation Difficulty | High | Low |
| Tools Needed | Drill, wires, tools | Basic tools (screwdriver) |
| Reliability | Very high | High |
| Best For | New builds, renovations | Renters, existing homes |
Most DIYers choose wireless systems because they’re simple, flexible, and easy to upgrade.
Can You Really Install A Home Alarm System Yourself?
The short answer: yes, most people can—especially with wireless kits. But there are important things to consider:
- Technical Comfort: You should be comfortable using basic tools, following instructions, and connecting devices to Wi-Fi.
- Home Layout: Larger homes or complex layouts may need more planning.
- Time Commitment: Expect a few hours for installation and testing.
- Compliance: Some local areas require permits for alarm systems. Check your city’s rules before installing.
If you’ve ever set up a router, assembled furniture, or installed a smart thermostat, you have the basic skills needed.
Why People Choose Diy Home Alarm Systems
DIY home security systems are popular for several reasons:
Exclusive Deals
Limited-time Exclusive Deals. Check current discount on Amazon.
Check Price on Amazon As an Amazon Associate I earn from qualifying purchases.- Cost Savings: Professional installation can cost $100–$500 or more. DIY kits eliminate this fee.
- No Strangers in Your Home: You control the process, which adds privacy.
- Customizable: Add or remove components as your needs change.
- Easy Upgrades: Technology changes fast. DIY systems are often easier to update.
- No Long-Term Contracts: Many DIY brands offer month-to-month monitoring.
However, not every situation is a perfect fit for DIY. Some homes or needs may still benefit from a professional touch.
Challenges And Common Mistakes
While DIY is possible, it’s not always smooth sailing. Here are some pitfalls beginners often face:
- Poor Sensor Placement: Installing motion or door sensors in the wrong spot can lead to false alarms or missed intrusions.
- Ignoring Wi-Fi Range: Wireless devices that are too far from the base station may not work reliably.
- Skipping Testing: Failing to test every device after installation is a recipe for problems.
- Forgetting Backups: Not all DIY kits include battery or cellular backup for power/Wi-Fi outages.
- Misreading Instructions: Skimming setup guides leads to confusion or missed steps.
A smart tip: Always read the manual fully before starting. Lay out all components, and plan your sensor locations before mounting anything.
What You Need Before Starting
Preparation is key for a smooth DIY installation. Here’s what you should have ready:
- A Complete Alarm Kit: Make sure your kit includes all needed parts—control panel, sensors, mounting hardware, batteries.
- Basic Tools: Screwdriver, level, tape measure, ladder, and possibly a drill.
- Smartphone or Tablet: Most systems use an app for setup and control.
- Wi-Fi Password: You’ll need this for wireless systems.
- Floor Plan: Sketch your home to plan sensor locations.
Extra tip: Have some spare double-sided tape or mounting screws, just in case the included hardware isn’t perfect for your walls.
Step-by-step: How To Install A Home Alarm System Yourself
Let’s break down the typical process for a wireless DIY system. Installation steps may vary by brand, but these are the basics:
1. Unpack And Check Components
Open the box and lay out all items. Compare them to the parts list in your manual. Missing parts can cause delays.
2. Plan Device Placement
Walk through your home and decide where to put:
- Door/Window Sensors: Main entry points, ground-floor windows.
- Motion Detectors: Hallways, large rooms, away from pets.
- Glass Break Sensors: Near sliding doors or large windows.
- Keypad/Control Panel: Near main entry for easy arming/disarming.
A common mistake is clustering too many sensors in one area. Spread them out for full coverage.
3. Install The Control Panel
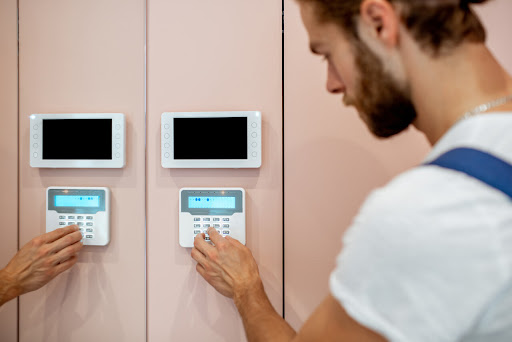
Mount the main panel at eye level near your most-used door. It needs power, so pick a spot near an outlet. Some panels are tabletop style and don’t require wall mounting.
4. Install Sensors
Most sensors stick to doors, windows, or walls with adhesive or screws. Clean surfaces first for strong adhesion. Use a level to make sure they’re straight.
- For door/window sensors, the magnet and sensor should line up closely when closed.
- For motion sensors, keep them 6–8 feet high and away from heat sources or moving curtains.
5. Connect To Wi-fi Or Hub
Most systems use an app. Follow prompts to connect your control panel and sensors to your home Wi-Fi or central hub.
6. Test Each Device
Before you finish, test every sensor. Open doors, walk past motion detectors, trigger alarms. Adjust placement if anything doesn’t respond.
7. Set Up Monitoring
Choose self-monitoring (alerts to your phone) or sign up for professional monitoring if available. Enter emergency contacts into the system.
8. Final Checks And Maintenance
Walk through your home and double-check sensor positions. Set reminders to check batteries every 6–12 months.
Which Brands Are Easiest For Diy Installation?
Not all alarm systems are equally easy to install. Here are some top options favored by DIYers:
| Brand | Type | DIY Difficulty | Monitoring Options |
|---|---|---|---|
| SimpliSafe | Wireless | Very Easy | Self/Pro |
| Ring Alarm | Wireless | Easy | Self/Pro |
| Abode | Wireless | Easy | Self/Pro |
| ADT Self Setup | Wireless | Moderate | Self/Pro |
| Blue by ADT | Wireless | Easy | Self/Pro |
Most users find SimpliSafe and Ring Alarm the simplest for beginners. They come with clear instructions, labeled parts, and reliable apps.
When To Call A Professional Instead
DIY isn’t always the best route. Consider professional installation if:
- Your home is very large or has complicated wiring.
- You want a wired system for maximum reliability.
- You’re uncomfortable with tools or technology.
- You need integration with advanced smart home systems.
- Local regulations require certified installers.
Professionals can also help if you want the fastest setup, or if you need features like fire/smoke monitoring, which sometimes require code compliance.
Costs: Diy Vs. Professional Installation
Cost is a big reason people go the DIY route. Let’s compare:
| Expense | DIY System | Professional System |
|---|---|---|
| Starter Kit Price | $150–$400 | $300–$1,000 |
| Installation Fee | $0 | $100–$500+ |
| Monthly Monitoring | $10–$30 | $30–$60 |
| Contract Required | No | Often Yes (1–3 yrs) |
Over three years, DIY can save you hundreds or even thousands of dollars. But remember, professional systems sometimes include more advanced equipment and warranties.
Hidden Challenges Most Beginners Miss
1. Wi-fi Outages Can Disable Alerts
Many DIY systems depend on Wi-Fi. If your internet goes down or there’s a power outage, you might not receive alerts. Some brands offer cellular backup (for a fee), but it’s not always included. Always ask about backup options before buying.
2. Battery Maintenance Is Your Responsibility
DIY sensors run on batteries. If you forget to check and replace them, your system can silently fail. Set calendar reminders to check battery status every few months. Some systems show alerts in the app, but it’s easy to miss.
3. False Alarms Can Lead To Fines
If your system accidentally triggers and the police are called, some cities issue fines after multiple false alarms. Test your system after installation and teach family members how to use it properly.
4. Limited Integration With Existing Smart Home Devices
Not all DIY alarm systems work with every smart device. For example, some may not connect with your existing cameras or smart locks. Double-check compatibility before purchasing.
Practical Tips For A Smooth Diy Installation
- Read Reviews: Before buying a system, check real user reviews for ease of installation and support.
- Label Everything: As you unpack, label sensor locations with sticky notes before mounting.
- Use the App During Setup: Most brands guide you step by step in their app, making mistakes less likely.
- Test During Different Times: Try the system in daylight and at night, with the house quiet and busy.
- Get Family Involved: Teach everyone how to arm/disarm and what to do if the alarm goes off.
- Keep Manuals Handy: Store all instructions and warranty info in one place for future reference.
How Diy Alarm Systems Compare In Security
You might wonder if a DIY system is as secure as a pro-installed one. The answer: for most homes, yes—if you install and maintain it properly.
- Sensors: Good DIY systems use the same technology as pro brands.
- Alerts: You get instant smartphone notifications.
- Monitoring: Optional professional monitoring is available for emergencies.
- Customization: You can add cameras, smart locks, and extra sirens.
However, you’re responsible for ongoing maintenance and updates. Pro systems may offer more advanced features, like glass-break detection built into every sensor or better backup options.

The Real Value: Peace Of Mind
Installing your own alarm isn’t just about saving money. It’s empowering—you control your security, know how everything works, and can fix issues quickly. Many users report feeling more confident after DIY installation because they understand their system inside and out.
But remember: peace of mind only comes if you test your system regularly, keep batteries fresh, and stay updated on the latest features.
Frequently Asked Questions
How Long Does It Take To Install A Diy Home Alarm System?
Most wireless systems take 1–3 hours for a standard home. If you have more doors and windows, or want to add cameras, plan extra time. Reading instructions fully before starting will save headaches.
Do I Need Special Tools To Install A Home Alarm System?
Usually, only basic tools like a screwdriver, drill (sometimes), ladder, and level are needed. Many sensors use adhesive mounts, so drilling is optional.
Can I Get Professional Monitoring With A Diy System?
Yes, most DIY brands offer optional professional monitoring for a monthly fee—no long contracts required. You can also choose self-monitoring, where alerts go to your phone.
What Happens If My Wi-fi Or Power Goes Out?
Some systems offer cellular backup or battery backup, but not all do. If your system only uses Wi-Fi and power fails, alarms may still sound locally but remote alerts won’t work. Always ask about backup features before buying.
Do I Need A Permit To Install A Home Alarm System?
In some cities, you need a permit for any alarm that can call emergency services. Check your local regulations before installing to avoid fines or service disruptions. Your system manual or city website will have details, or you can check resources like Alarms.org.

Final Thoughts
DIY home alarm systems put strong security within reach for most people. With a little planning, some basic tools, and careful setup, you can protect your home without spending a fortune or waiting for installers. The most important steps are choosing a system that matches your needs, placing sensors wisely, and testing your system regularly.
While professionals are still best for complex homes or those needing advanced integration, most homeowners can handle DIY. If you’re ready for more control and peace of mind, a DIY system is a smart investment. Just remember: your safety depends on installation quality and routine checks—so take your time and don’t skip the details.