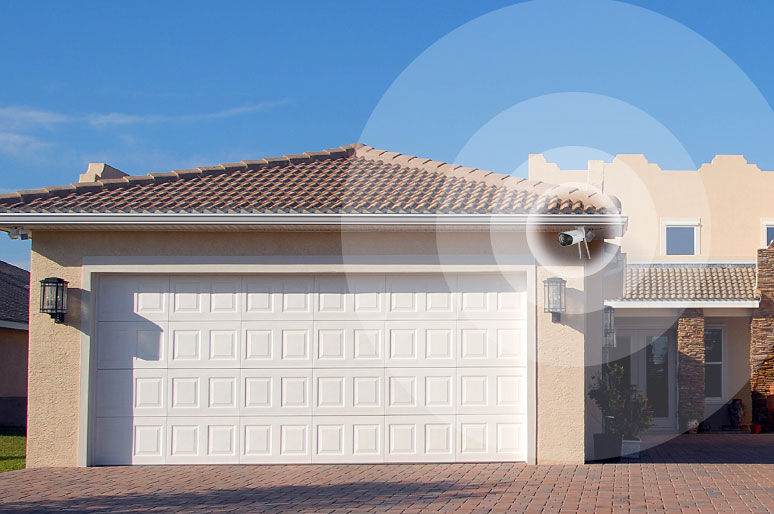
Garage Camera vs Driveway Camera: choose the right placement for access, coverage, and theft prevention.
Exclusive Deals
Limited-time Exclusive Deals. Check current discount on Amazon.
Check Price on Amazon As an Amazon Associate I earn from qualifying purchases.I’ve worked with home security systems for over seven years, installing cameras and advising homeowners on coverage strategies. This article compares Garage Camera vs Driveway Camera in practical detail. You’ll learn how each option performs, which features matter, real-world trade-offs, and how to pick the best setup for your home. Read on for clear guidance, simple checklists, and hands-on tips that I use in the field.

Why the Garage Camera vs Driveway Camera decision matters
Choosing between a garage camera and a driveway camera changes what you see and how you protect your home. A garage camera focuses on entry points, tools, and vehicles inside or at the garage door. A driveway camera watches public approach, package drop zones, and cars before they reach the garage.
I’ve seen homes with only one camera miss key events. A driveway camera often spots suspicious activity earlier. A garage camera records final entry and can deter indoor theft. When you understand these roles, you can design a layered system that covers weak spots and reduces blind zones.
Exclusive Deals
Limited-time Exclusive Deals. Check current discount on Amazon.
Check Price on Amazon As an Amazon Associate I earn from qualifying purchases.
Garage Camera vs Driveway Camera: key differences
Here are the main contrasts to weigh when you compare a garage camera vs driveway camera.
- View focus: Garage cameras capture the garage interior and door. Driveway cameras capture the driveway length and curb approach.
- Lighting needs: Garages are darker and need good infrared or internal lights. Driveways benefit from wide dynamic range for daylight glare.
- Weather exposure: Garage cameras are often indoor or sheltered. Driveway cameras must resist rain, snow, and sun.
- Field of view: Garage cameras can use narrower views for details. Driveway cameras typically need wider angles to catch vehicles and faces.
- Trigger and alerts: Driveway units often detect motion earlier; garage units catch the final action.
These differences guide your camera selection, lens choice, and placement plan. Knowing them helps you pick cameras that meet real needs rather than marketing claims.
Technical features to compare
When testing or buying, evaluate these specs for both garage and driveway cameras.
Exclusive Deals
Limited-time Exclusive Deals. Check current discount on Amazon.
Check Price on Amazon As an Amazon Associate I earn from qualifying purchases.- Resolution: High resolution helps identify faces and plate numbers. Aim for 1080p minimum; 2K or 4K is better for wide driveways.
- Night vision: Look for true IR or color night modes for garages. For driveways, choose cameras with strong low-light performance and IR range.
- Field of view: Narrower FOV helps inside the garage. Wider FOV covers long driveways. Consider using one narrow and one wide camera together.
- Weather rating: Driveway cameras should be IP65 or higher to resist weather. Garage cameras can be indoor-rated.
- Power: Wired power is stable. Battery cameras are flexible but need frequent recharge if used on busy driveways.
- Connectivity: Reliable Wi-Fi or wired Ethernet matters. Driveway cameras often need stronger signals; consider mesh Wi‑Fi or PoE.
- Smart detection: Vehicle detection, person detection, and license plate recognition help reduce false alerts for driveways. Garage cameras benefit from package or motion alerts near doors.
Balancing these features will give you a system that works day and night. I recommend mapping features to the area you want to protect before buying.

Placement, mounting, and installation tips
Good placement beats better specs when a camera is installed poorly. Use these practical tips from field experience.
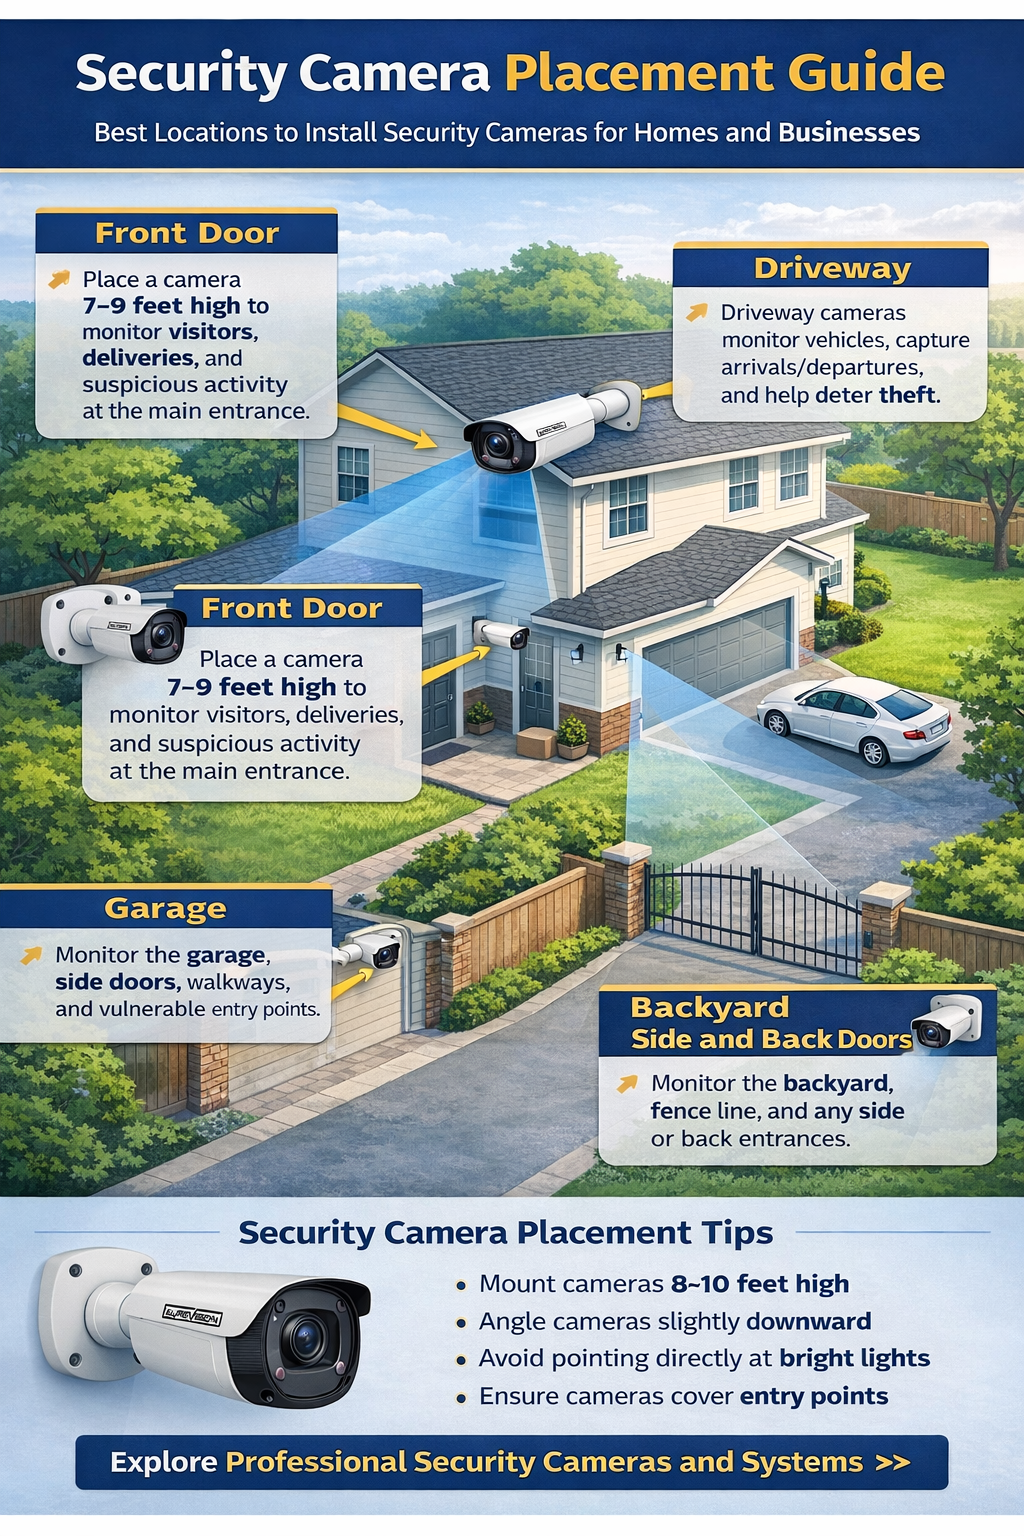
- Garage camera placement: Mount above the door inside the garage. Aim down at 30–45 degrees to catch faces and hands. Keep it 6–8 feet high for the best angle.
- Driveway camera placement: Mount on a pole or the house eaves and point along the driveway length. Place at least 8–10 feet high to limit tampering and get a clear view of faces.
- Avoid backlighting: For driveways, avoid pointing the camera toward the rising or setting sun. Use HDR-capable cameras to handle glare.
- Cable routing: For wired installs, run cables through soffits or conduit. Label ends and keep joins in weatherproof boxes.
- Test angles: Take test footage at different times of day. Adjust angles to reduce blind spots and maximize useful detail.
- Power considerations: If no outlet exists, use Power over Ethernet (PoE) for wired cameras or a solar/battery option for remote posts.
I once mounted a driveway camera too low. It captured feet and tires but missed faces. Raising it and using a slight tilt fixed the issue immediately.

Use cases and scenarios
Here are sample scenarios to help you choose based on real needs.
- Frequent package theft: Prioritize a driveway camera to catch porch thieves approaching. Add a garage camera to catch anyone entering later.
- Tool or car theft from garage: Choose a garage camera focused on the interior and door area.
- Long driveway or gated property: Use multiple driveway cameras for overlapping coverage. License plate capture may be helpful.
- Shared driveways or condos: A driveway camera can monitor common areas. Check community rules for recording.
- Nighttime security concerns: Use cameras with good night vision for both locations; add motion lights for extra deterrence.
These scenarios reflect cases I’ve handled. Often the best approach is both camera types working together.

Cost, maintenance, and lifecycle
Budget and upkeep shape long-term value. Compare costs and maintenance needs.
- Upfront cost: Driveway cameras may cost more if you need weatherproofing and higher resolution. Garage cameras are often cheaper.
- Installation cost: Wired driveway installs can be costlier due to outdoor cabling. Garage installs are typically simpler.
- Ongoing costs: Cloud storage fees and battery replacements add to cost. Wired cameras reduce ongoing expenses.
- Maintenance: Outdoor cameras need lens cleaning and occasional resealing. Garage cameras require less weather-related upkeep.
- Lifespan: Weather exposure can shorten the lifespan of driveway cameras. Choose metal housings and UV-resistant plastics for longevity.
I recommend calculating 3–5 year total cost of ownership before buying. That gives you a realistic budget for hardware, installation, and storage.
Privacy, legal, and neighborhood considerations
Recording outside your home has rules. Know them before you install.
- Legal limits: Most areas allow recording on your property. Avoid capturing audio from public areas without consent. Local laws vary.
- Neighbor privacy: Aim cameras at your property. Avoid pointed views into neighbors’ windows or private yards.
- Signage and disclosure: Some regions require signs for audio recording. Even if not required, a visible camera and sign deter misbehavior.
- Data protection: Use strong passwords and enable two-factor authentication. Keep firmware updated to reduce hacking risk.
I once advised a neighbor to reposition a driveway camera that angled into a neighbor’s backyard. Small adjustments prevented conflict and kept coverage where it mattered.
Combining garage and driveway cameras: a layered approach
The best security is layered. Combining a garage camera with a driveway camera fills coverage gaps.
- Early detection: Driveway camera spots approach and gives early alerts.
- Final proof: Garage camera records door entry and damage inside.
- Redundancy: If one device fails, the other often still captures crucial footage.
- Smart workflows: Configure driveway alerts for detection and garage camera for close-up verification.
Use shorter recording windows to save storage. Tag events by camera so you can review the full timeline from approach to entry quickly.
How to choose: quick checklist
Use this checklist to pick the right camera mix for your home.
- Identify assets to protect: Vehicles, tools, packages, entry points.
- Map camera sightlines: Draw simple lines showing coverage and blind spots.
- Match features to location: Weatherproofing for driveway, strong low-light for garage.
- Budget for installation and storage: Factor in wiring and cloud fees.
- Plan redundancy: Use at least one camera that covers arrival and one for entry.
Following this checklist reduces regret after installation. I use it with every client to avoid common mistakes.
PAA-style questions about Garage Camera vs Driveway Camera
Which camera sees suspicious activity earlier, garage or driveway?
A driveway camera usually sees people approaching earlier. It gives advanced warning before someone reaches the garage.
Do driveway cameras need higher resolution than garage cameras?
Yes, driveways often need higher resolution for license plates and distant faces. Garages can use tighter framing with lower resolution.
Can a single camera cover both garage and driveway effectively?
A single wide-angle camera can cover both, but it often sacrifices detail. Using two cameras is usually better for clarity and evidence.
Frequently Asked Questions of Garage Camera vs Driveway Camera
What is the main difference between a garage camera and a driveway camera?
The main difference is coverage: garage cameras monitor indoor or sheltered areas near the garage door, while driveway cameras monitor the approach and curb area outside.
Which camera is better for package theft prevention?
A driveway camera is better for catching package thieves because it records the approach and drop-off location before items enter the property.
Are driveway cameras more expensive to install than garage cameras?
Yes, driveway cameras often cost more due to weatherproofing and outdoor cabling needs. Installation labor for outdoor wiring increases the price.
Do garage cameras need special night vision?
Garage cameras need good low-light performance or IR since garages are darker. Adding motion lights improves image quality at night.
Can I use battery cameras for the driveway?
You can use battery cameras, but busy driveways may require frequent recharging. Consider solar panels or wired options for continuous monitoring.
Conclusion
Choosing between a garage camera vs driveway camera is about coverage and intent. Driveway cameras alert you to approaching threats and catch actions early. Garage cameras protect what is inside and record final entry. My advice: design a layered setup with both cameras if your budget allows. Start by mapping coverage, prioritize the features you need, and test angles at different times of day. Take action now: sketch your property, pick one key area to secure first, and upgrade step by step. Share your setup or questions below and I’ll help refine your plan.